A Moment is a specific event in the consumer's journey at which timely communication or interaction with the consumer is triggered.
The most prominent example is abandoning a cart. When a consumer has added items to the cart but doesn't proceed to check out within a given period of time, engagement with the consumer is triggered. When this interaction needs to take place is defined in the Moment, which on its turn will trigger the execution of a journey and/or the sending of a message.
Other examples of key moments include initiating or completing actions like filling out a survey, making a booking, starting a game, or abandoning a browsing session on your website. Additionally, moments can involve signing up for a website or webinar, canceling a newsletter subscription, or any other significant interaction with your platform. Each of these moments presents an opportunity to engage, guide, or respond to your customers in a meaningful way, enhancing their overall experience.
For a full list of all available Moment templates, please check out the Overview Supported Moments topic.
Create a Moment
Note: Moments can only be created when an Audience Configuration has been configured. Without the Audience Configuration it is not possible to continue the creation of the Moment and you will be taken to the Audience Configuration page where you have to create one first.
This Audience configuration is important as it determines for website signals from which domains signals can come in and to which audience these apply. For other signals, such as mobile signals coming in through the API, the keys in the Audience Configuration are required to know which signals to listen to.
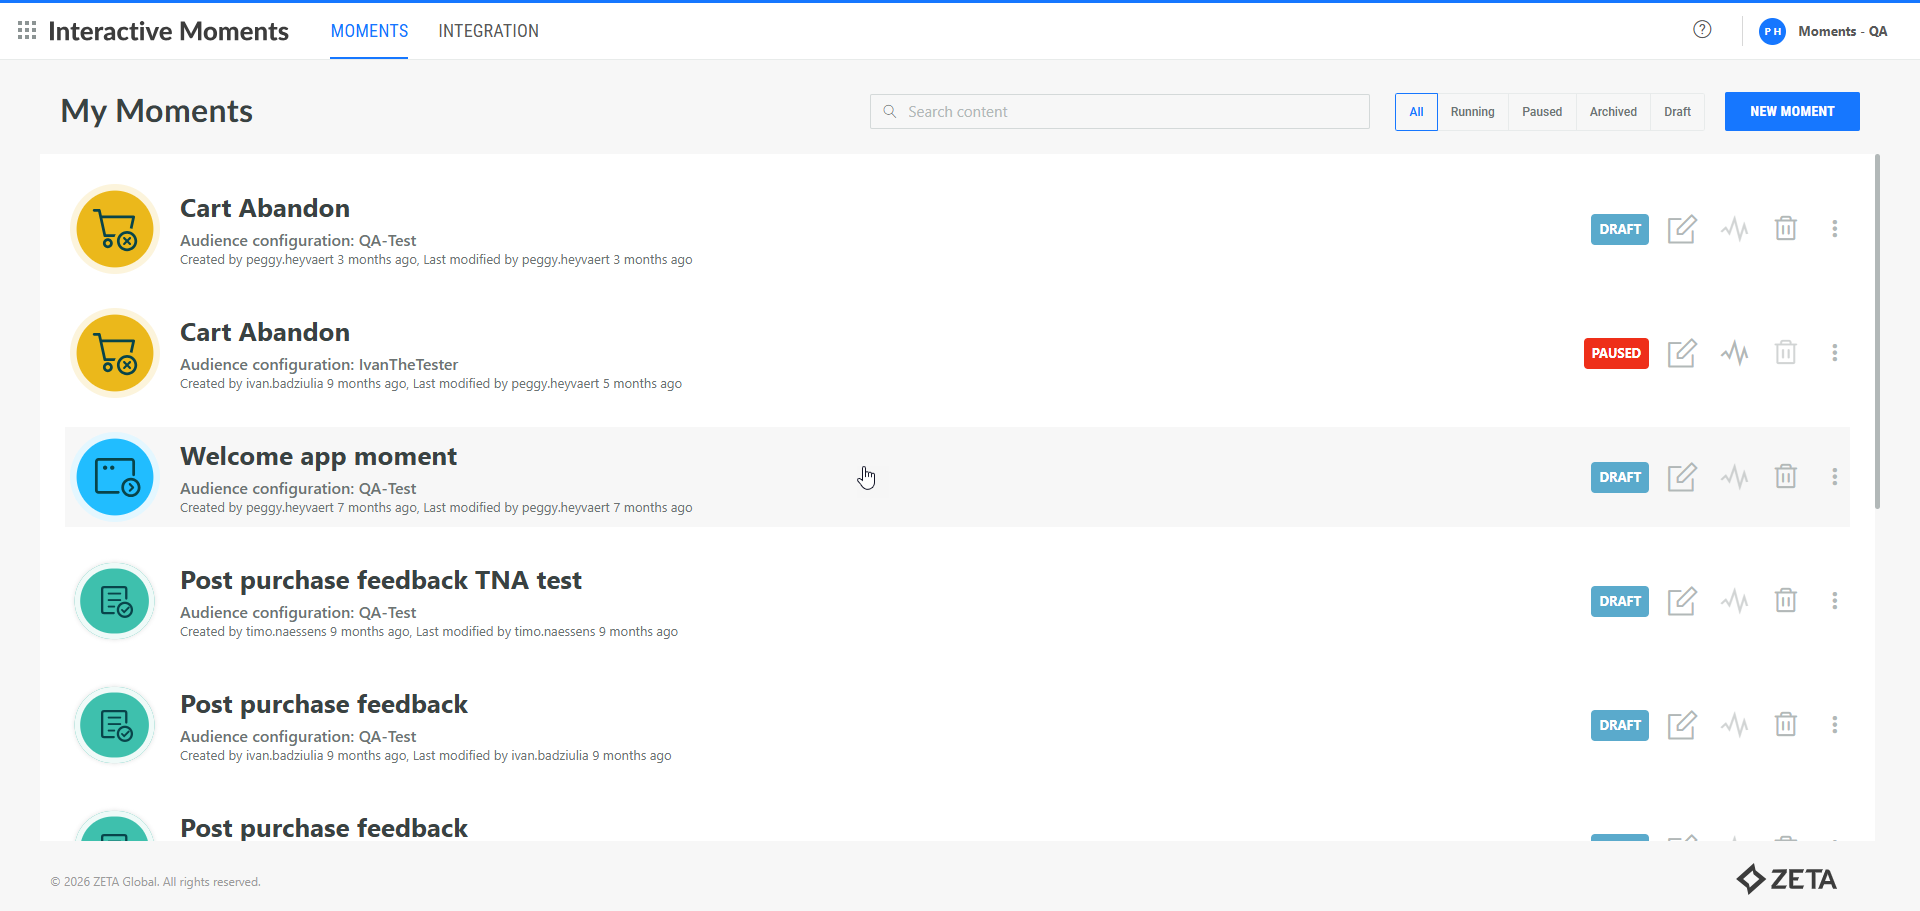
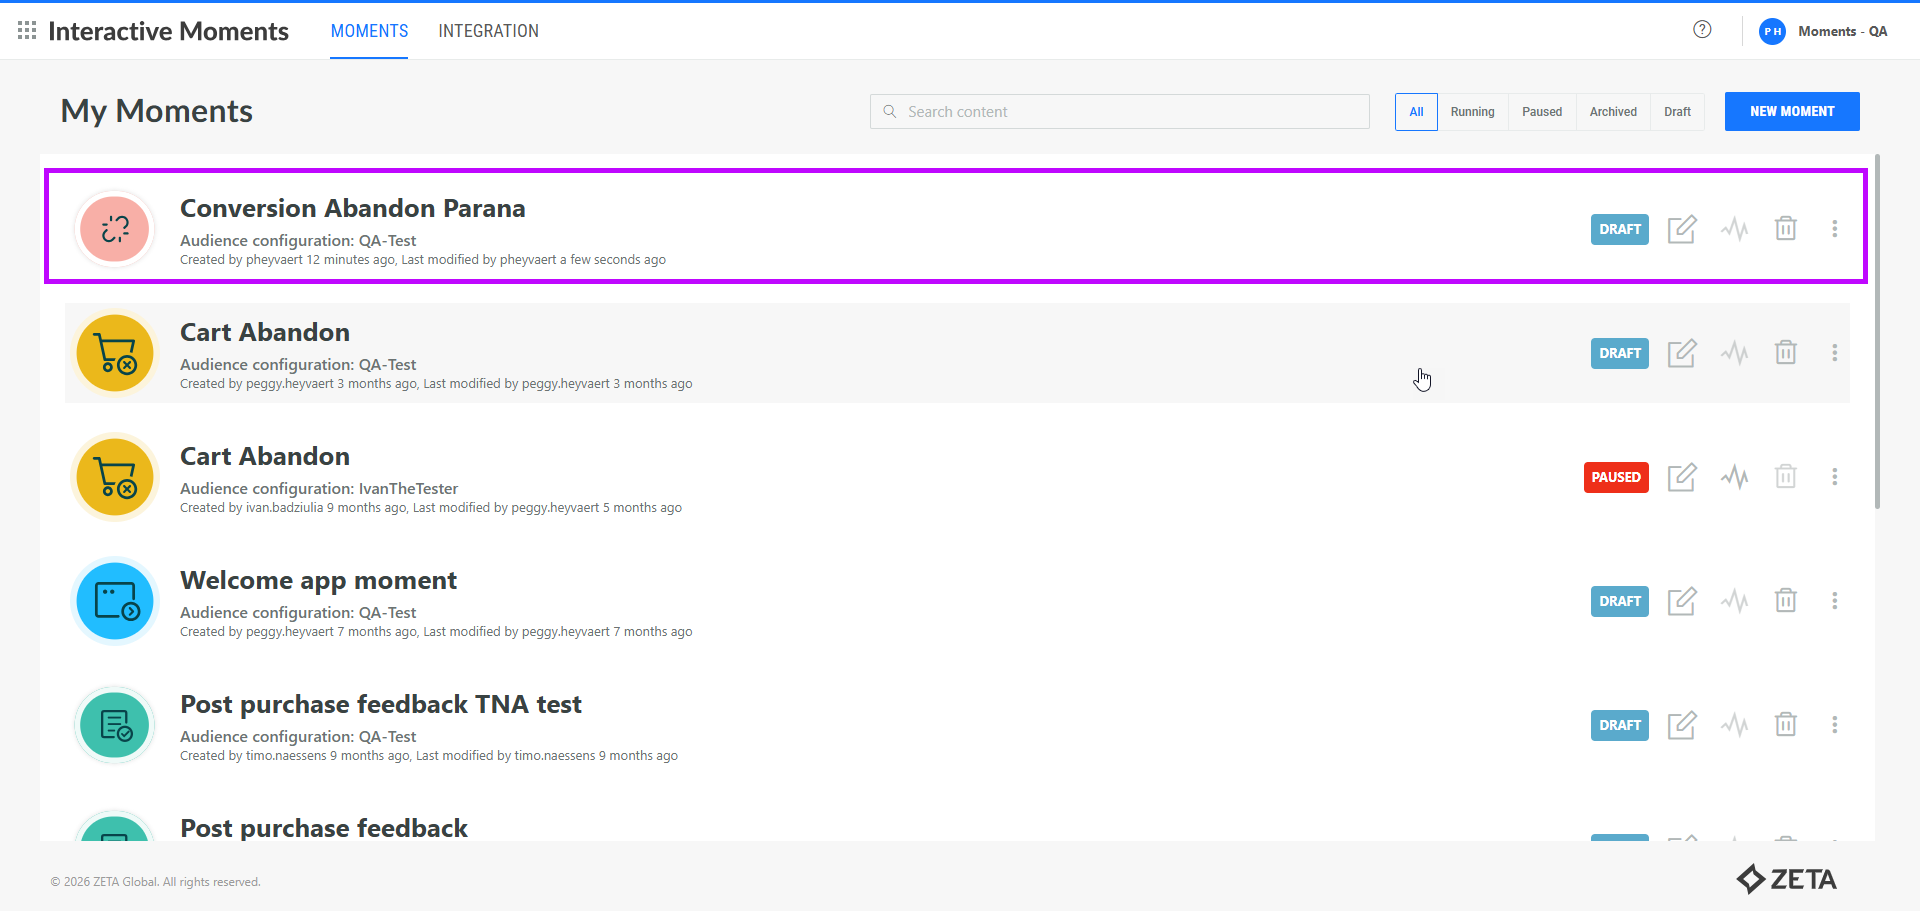
1. To create a Moment, open the Moments app and go to the Moments tab. An overview of all existing Moments is displayed, with the most recently updated at the top:
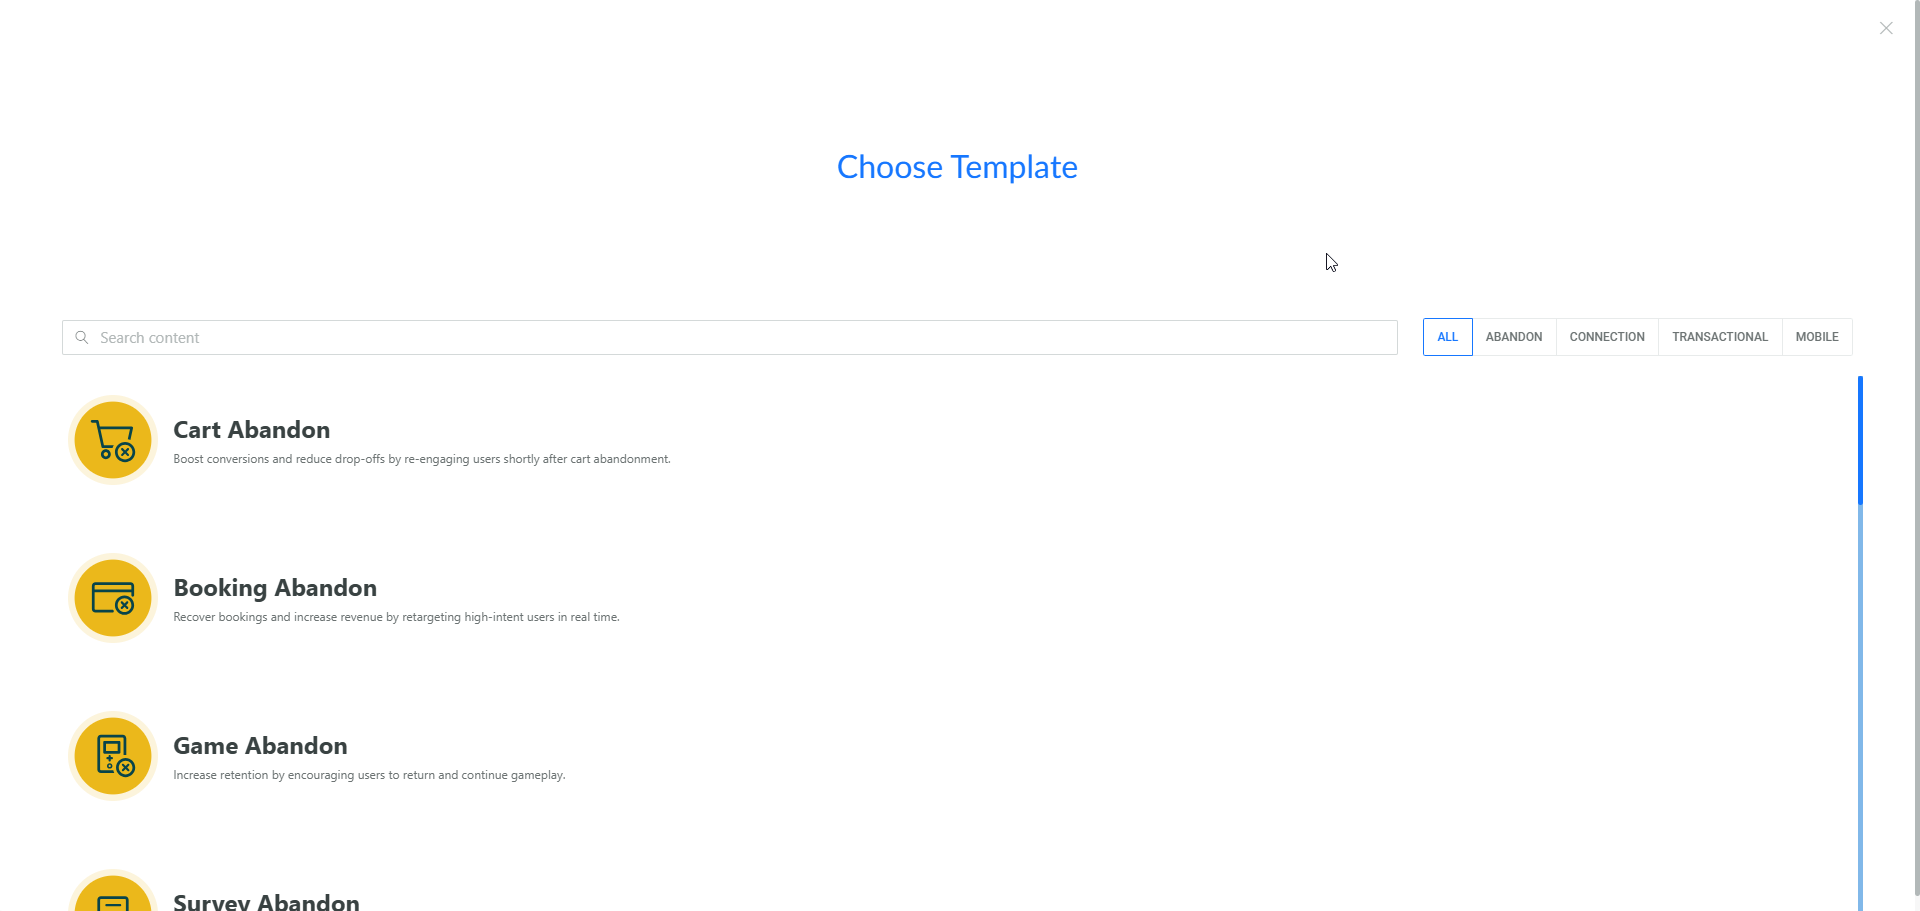
2. Click New Moment. A Template can be chosen. You can choose from a series of templates such as Cart Abandon, Booking Abandon, Browse Abandon, and more. The goal of each Moment template is indicated below the name.
Use the filter buttons at the top to limit the templates displayed to those in the selected category. For an overview of how the templates are categorized, check out this topic.
3. Next, provide a name and description for this Moment. This name and description should be explicit so you know what this moment is about. A default description is already set:
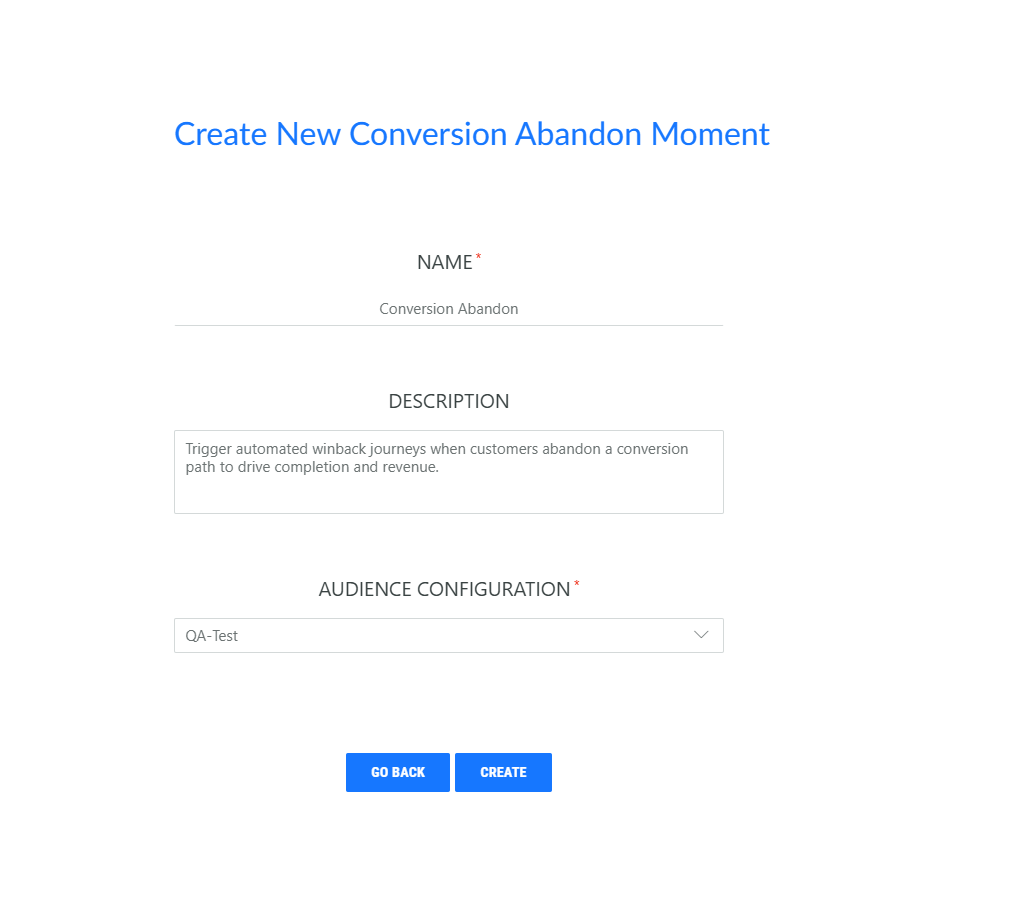
4. Select the Audience Configuration that applies to this specific Moment. By doing so, this Moment will only be triggered when website signals are coming from one of the domains defined in the Audience Configuration. Or in case other sources are used, such as mobile touchpoints, only the signals sent using the keys in the Audience Configuration are taken into account. In addition, the selected Audience Configuration defines also which audience will be updated and targeted by this Moment.
If no Audience Configuration exists yet, you are guided to the configuration page to create one. It is mandatory to have a linked Audience Configuration to be able to save the Moment.
5. Click Create. The Moment is created and the properties panel is shown. Depending on the selected template, these properties may be slightly different:
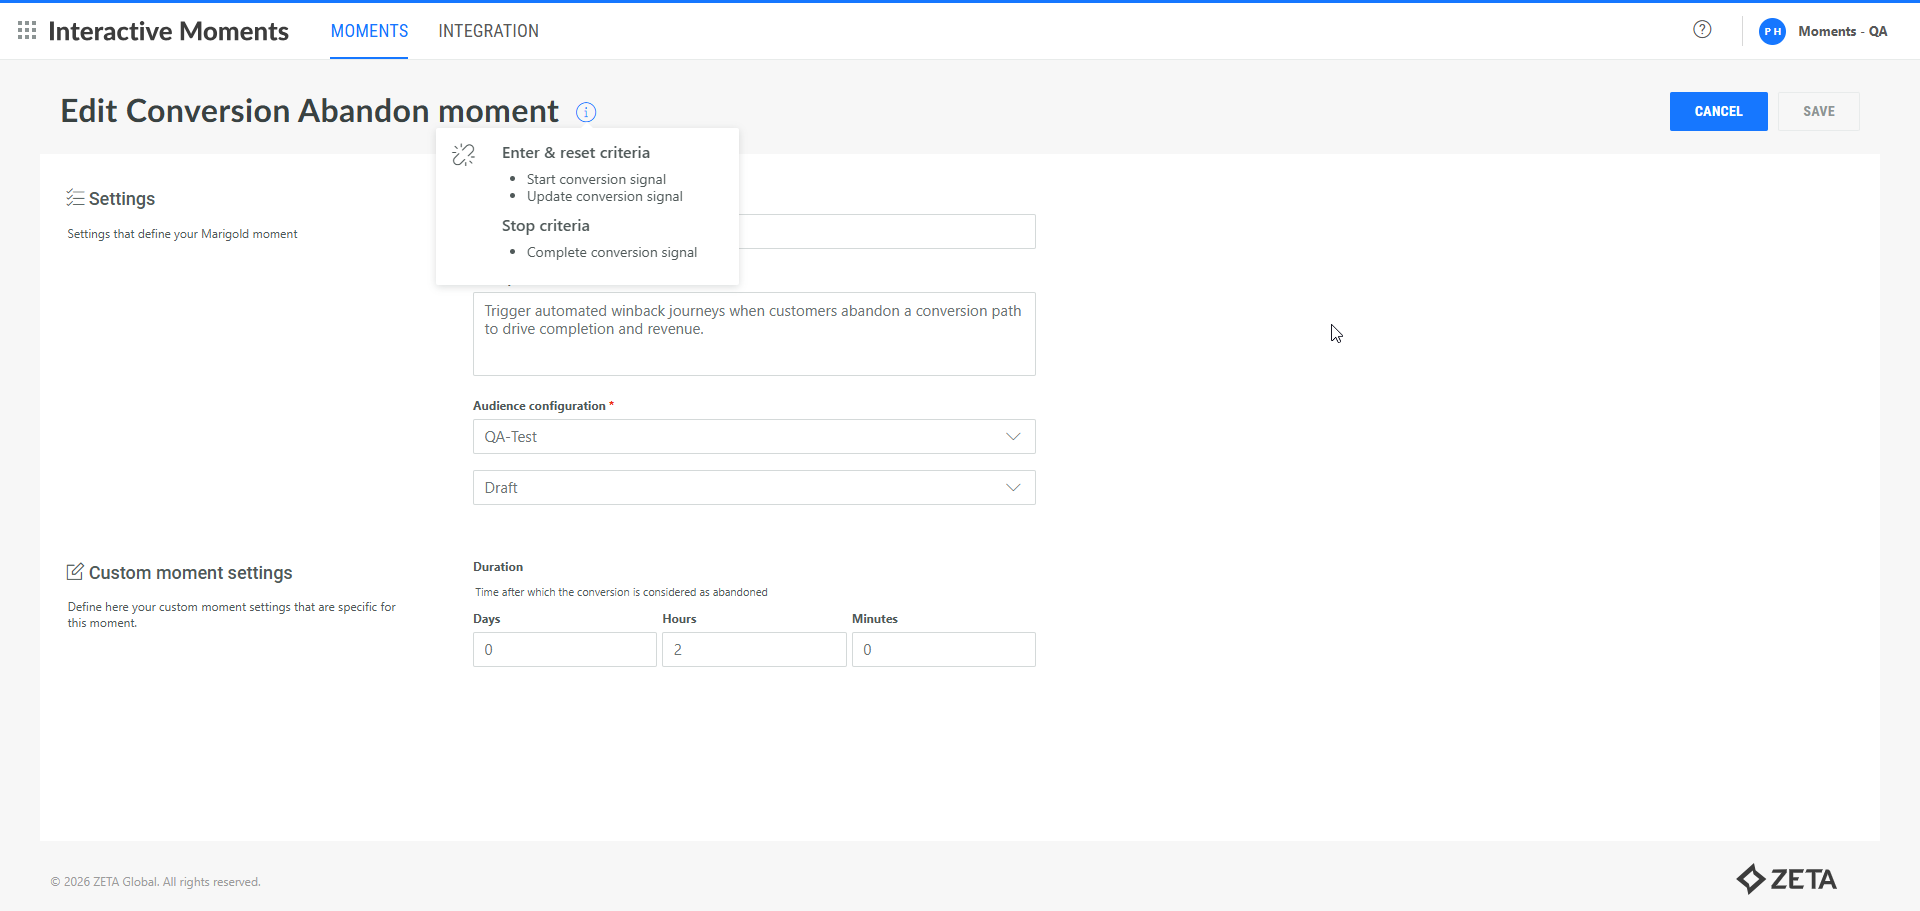
6. The Name, Description and Audience Configuration are filled out based on the information entered earlier during the creation.
Note: When you create a moment, a pop-up appears showing which signals that moment captures. Use this information to configure the integration for your specific use case.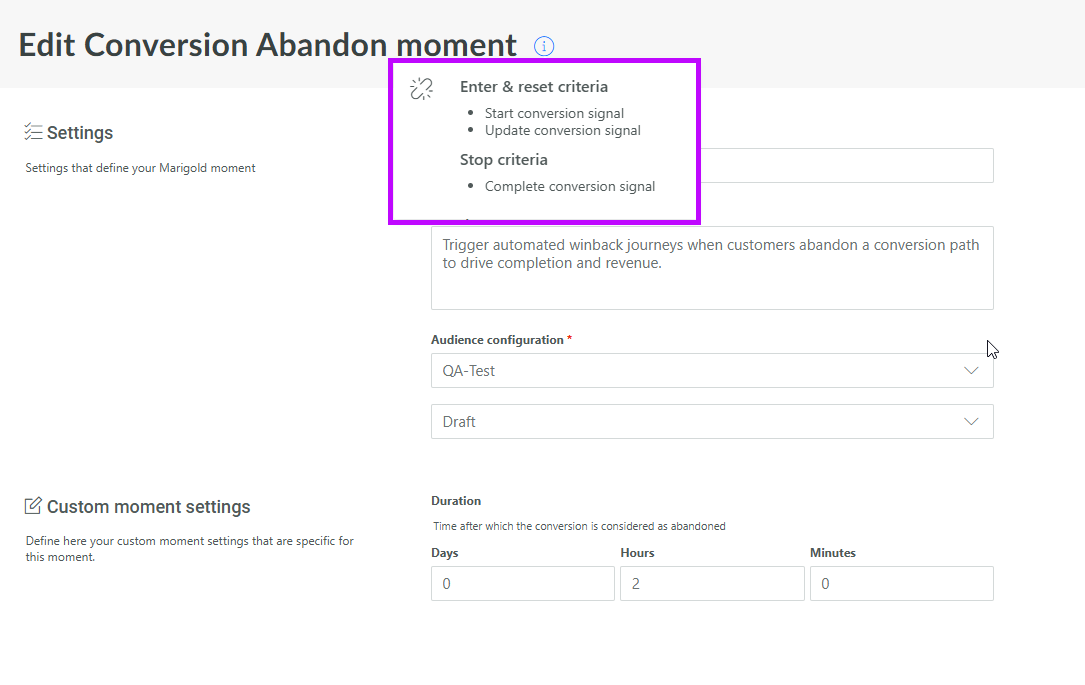
When editing an existing moment, this information is accessible through the i icon.
In the Custom Moment Settings, it's important to configure template-specific properties based on the nature of each Moment.
For instance, certain Moments may only be triggered after a specific amount of time has elapsed (e.g., abandoned moments). For these, you can define the Duration setting, such as triggering the Moment 2 hours after the last item is added to the cart.
Other Moments may have additional properties or requirements depending on their purpose, which should also be customized accordingly to ensure they perform as expected.
Note: For a full list of all the available Moments and their properties, check the overview topic.
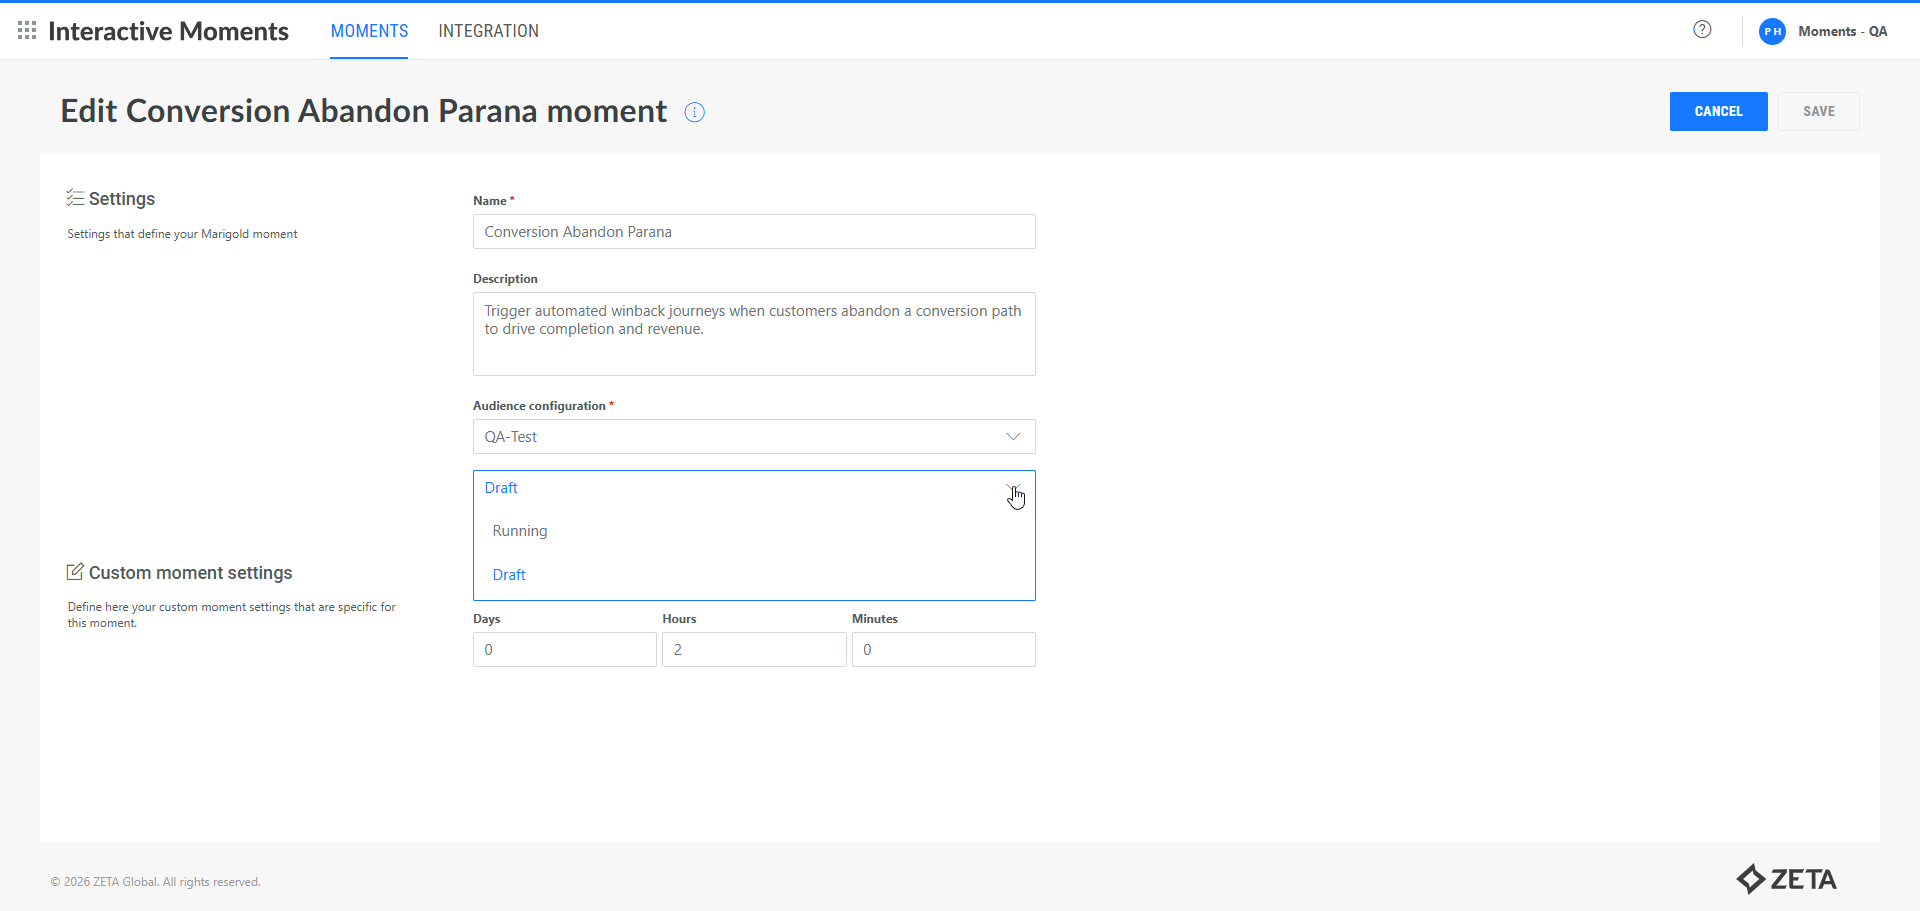
7. To activate this Moment, change the status to Running. Once the Moment is set to Running, the Audience Configuration cannot be changed anymore and neither can the moment configuration.
8. Press Save. The Moment is now available from the overview.
Note:
You can have multiple Moments per type of event, for example several Moments for the Cart Abandon. As each Moment is linked to a specific Audience Configuration, and hence to a specific set of domains, audience and keys, you can have different Moments for different domains and audiences. This means that signals coming from one domain will trigger a specific Moment, where signals from a different domain can trigger another Moment.
Technical note: The Moment type determines which journey will be triggered. In the journey set up, an event is selected that initiates the journey execution, and this event is associated with all Moments of that specific type.
For example, if a Moment of type Cart Abandon is created and the journey is set up to launch when an event of type abandon cart comes in, this journey will capture all Moments of type Cart Abandon and execute the journey for every Abandon Cart Moment that comes in.
Manage a Moment
Once a Moment is created, you can see it on the overview page. On this page, you can manage the Moment by updating the properties, changing the status, or even deleting it.
Click the Reporting icon, to access the Real-time analytics for this Moment.
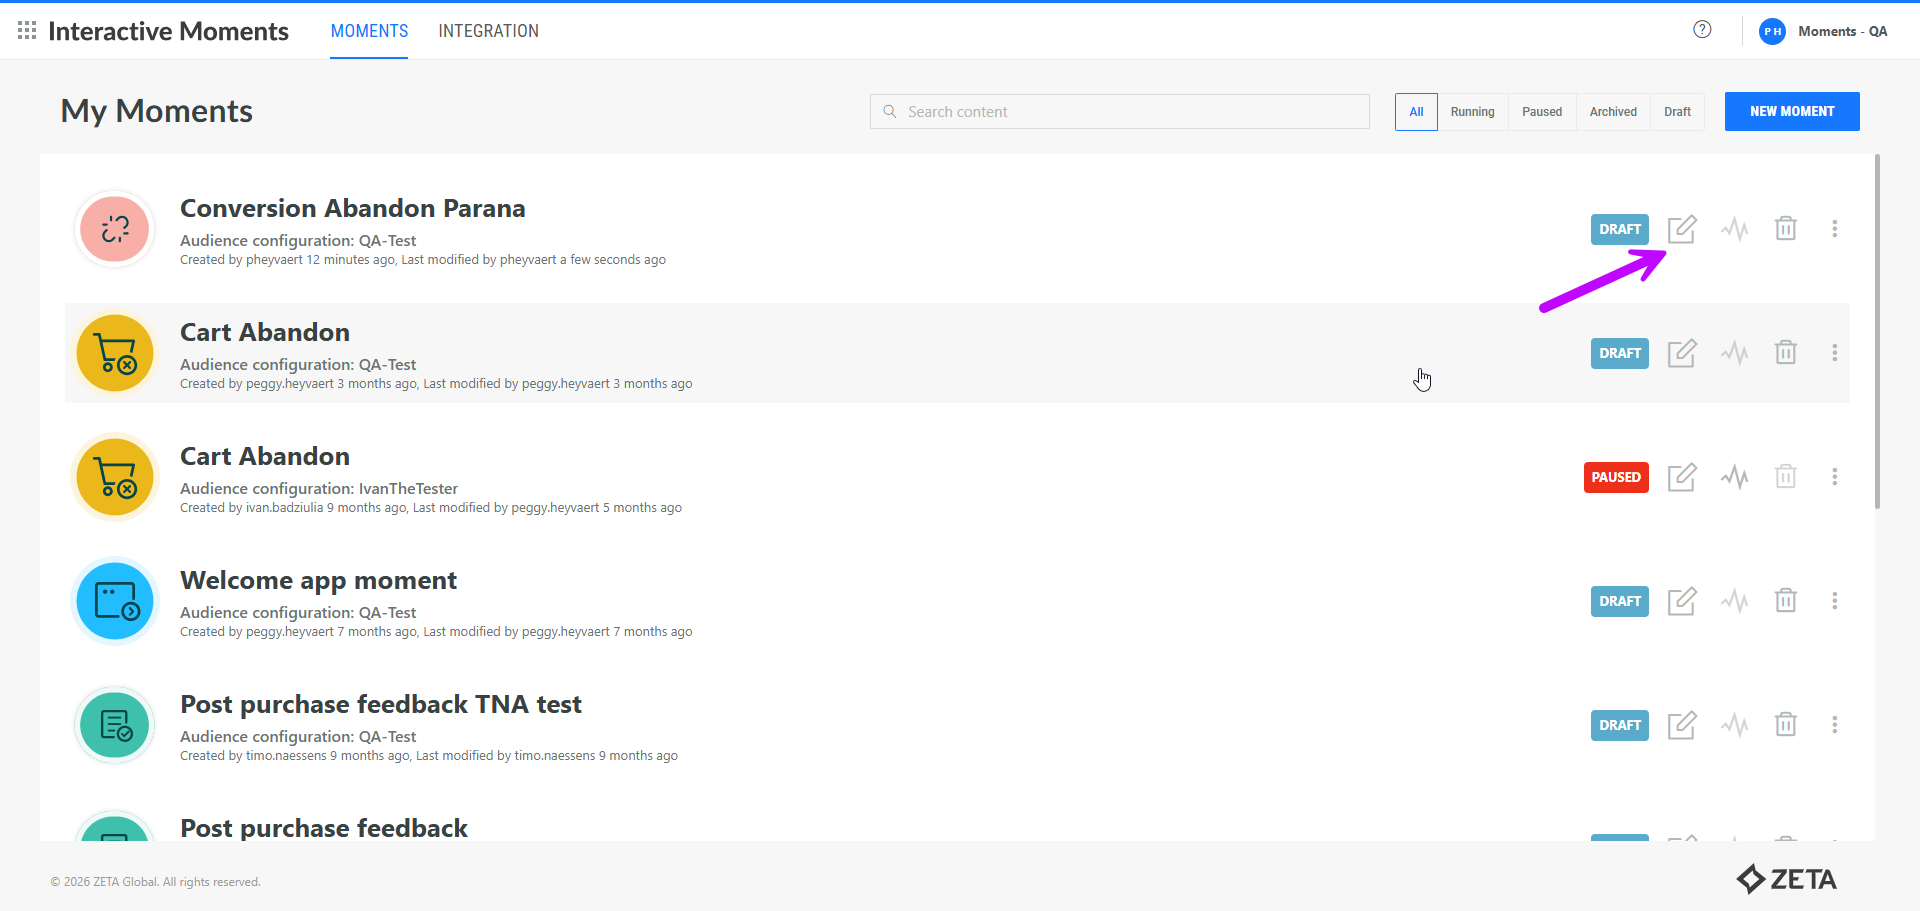
Click the Pencil icon to open the properties panel. You can change the name, description, time frame as well as the status.
-
Moments with status Running can only be updated to Paused or Archived.
-
Moments with status Paused can only be Archived or Started again (Running).
-
Moments with status Draft can be updated to Running. Note however, if there is no Audience Configuration linked to the Moment, it is not possible to activate it:

-
Moments with status Archived can be updated to Draft
Note: Only Moments with status Draft or Archived can be deleted.